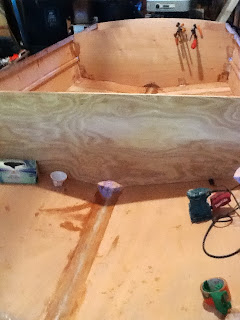
No progress due to work and weather. Good news is the winter tarp on the clam skiff survived Snowmagedon. 21" of snow in 18 hours, 45 mph wind with higher gusts. The ridge pole is the mast I built for a Birdwatcher II, decided to abandon that idea after the mast weighed more than I care to lift as a static load.


Read More..
Tampilkan postingan dengan label update. Tampilkan semua postingan
Rabu, 21 Desember 2016
Senin, 17 Oktober 2016
3 9 13 centerboard
I took the plunge today and bought a few board feet of 2X6 fir to start laminating the centerboard.
After an hour on the saw including set up, I have a pile of nice strips to glue up to the basic shape.


The logic to start on this part of the boat was that the garage is still too cluttered and cold for serious building and these parts can be done with the glueing indoors and the shaping outdoors. The centerboard trunk will be determined by the final shape of this part, so there it is.
Plywood will be ordered next week so it arrives when Im home to receive it!
Read More..
After an hour on the saw including set up, I have a pile of nice strips to glue up to the basic shape.


The logic to start on this part of the boat was that the garage is still too cluttered and cold for serious building and these parts can be done with the glueing indoors and the shaping outdoors. The centerboard trunk will be determined by the final shape of this part, so there it is.
Plywood will be ordered next week so it arrives when Im home to receive it!
Label:
13,
3,
9,
boat making,
centerboard,
update,
winter
Senin, 26 September 2016
June 30 update
After many hours of filling and sanding, I almost have a fair hull. I am thinking of two more cycles of filling and sanding. All the seams have been taped and faired at this point in time. 30 more minutes with the palm sander and we should be good. For the wide open spots, it is hand sanding with 80 grit on a two foot long board. This works pretty well.
![]() | |
| Getting there. This is after two cycles of filling and sanding with the long board. Two more cycles. I wish there were a machine for this. I now have forearms like Popeye. |
![]() |
| The low spots are clearly visible in this shot. Probably two more fillings and sandings. |
![]() |
| Quite a few low spots visible from this view. But they are all shallow. |
Label:
30,
boat making,
june,
update
Kamis, 28 Juli 2016
March 9th update rudder assembly and Centerboard shaping
It has been a very long and cold winter in New England. Working outdoors to do planing, shaping, and fairing of the blades has been impossible due to the weather and family/work schedule. I have put in for retirement, so time to work on the boat is not far away. The weekly 60 hour work week gets in the way of these important things.
today - assembled the rudder head stock, and fitted the shaped blade. Nothing fancy on the shaping, I simply planed and sanded a reasonable shape to the flat stock so that the thickest sections were about 1/3 back. Will coat with epoxy and paint when the days get longer and warmer.


Read More..
today - assembled the rudder head stock, and fitted the shaped blade. Nothing fancy on the shaping, I simply planed and sanded a reasonable shape to the flat stock so that the thickest sections were about 1/3 back. Will coat with epoxy and paint when the days get longer and warmer.

Builders of a CS 17 should note that the leading edge of the rudder protrudes slightly forward of the head stock. When the pintles are added, it will be in line with the pivot point.

yup, Its snug, but wont take much to loosen up. A little sanding and then prime and paint.
Centerboard shaping -
From the blank, I attached a NACA 0006 series template to the end of the tip and drew a line around the tip. Then I set up the router to rout grooves to the depth indicated on the template up and down each side.

template is sitting on the blade, was attached to the tip. radial lines kept to the ratio were then scribed on the blade and a guide for the router set up.

Not bad for a first attempt. A few low spots and some high spots still, but fixable. the router and electric plane made short work of this. Then followed up with the wood eraser (7" disc grinder), and palm sander.


Leading edge needs some attention, and I still need to shape the tip. Not quite sure what I am going to do here. Just a simple rounding over? When the board is raised partially, this will also be a quasi trailing edge.
Label:
9th,
and,
assembly,
boat making,
centerboard,
march,
rudder,
shaping,
update
Selasa, 12 Juli 2016
status update
The inwales are glued in place with the temporary screws removed. I am trying to use as few metal fastenings as possible to keep the cost down. The System 3 Epoxy is quite strong itself. I have filled and taped the center seam and the forward bulkhead as well as the stem. Here are some photo updates.
Read More..
![]() |
| forward bulkead as seen from inside. All taped. |
![]() |
| view of the center seam looking aft. It is clear to me at this point that there is no way the keel batten will go in without modifying of removing the center frame. |
![]() |
| View of the center seam at the forward bulkhead looking forward. The patch on the bottom is barely visible at this point in time. |
![]() |
| view looking forward. The seat risers and inwales are clearly viewed from this perspective. |
Label:
boat making,
status,
update,
wired
Rabu, 18 Mei 2016
mast step
on to some other elements of this boat. The mast step looked to be a bit of a challenge. Step one was to get the waterline level.
The designer stipulates that to set the craft level, put the bow 10" higher than the transom. Easier said than done. As soon as i lifted the boat up in the stern to form the correct distance, the port corner of the transom was 1" lower than the starboard. Therefore, i used the line dead center between these two points on the transom.
After this was set, I cut a piece of plywood to be the triangular top per the plans. 9 1/8 X 8 xxx. Low and behold this created a distance of over 24" between the deck level and the mast step. This would make the mast tube a little short for trimming correctly, and put the rig 3" lower. Not tolerable. Additionally, there is to be a 3 degree tilt to the step to get the mast angle correct. I spent hours working on this problem. My daughter is a math wizard and confirmed that this equates to a little less than 1" in 20".
I then cut a larger triangle that would sit so the mast tube would be about 21" from the deck. Putting the rig up higher, and providing enough tube to work with. Then, a trip to the hardware store to get things plumb and angled correctly. I purchased a cheap bubble level, and a dial protractor.

Read More..
The designer stipulates that to set the craft level, put the bow 10" higher than the transom. Easier said than done. As soon as i lifted the boat up in the stern to form the correct distance, the port corner of the transom was 1" lower than the starboard. Therefore, i used the line dead center between these two points on the transom.
After this was set, I cut a piece of plywood to be the triangular top per the plans. 9 1/8 X 8 xxx. Low and behold this created a distance of over 24" between the deck level and the mast step. This would make the mast tube a little short for trimming correctly, and put the rig 3" lower. Not tolerable. Additionally, there is to be a 3 degree tilt to the step to get the mast angle correct. I spent hours working on this problem. My daughter is a math wizard and confirmed that this equates to a little less than 1" in 20".
I then cut a larger triangle that would sit so the mast tube would be about 21" from the deck. Putting the rig up higher, and providing enough tube to work with. Then, a trip to the hardware store to get things plumb and angled correctly. I purchased a cheap bubble level, and a dial protractor.

It took 5 minutes to get the step marked for installation. total cost $11. Highly recommended.
Then, I discovered I had an app on my phone that would do it as well! Doh!
Will build the support structure for under the step this weekend.
Due to the high degree of variability with the forward section of each hull during the butterfly, stitch and glue process, I think that each mast step needs to be individually scribed and installed.
Will double check the deck to step dimensions again tomorrow. Looks like a finished tube will be 24". I would like to leave it about an inch or two proud of the deck, then cut the aft half off to provide a little purchase for stepping the mast. (although, a nice little mahogany box would do the same to receive the base of the mast. would look cool, and could be trimmed with stainless! Now were cookin
Hope to flip it this weekend and shape and tape the seams prior to finishing the interior.
Label:
boat making,
mast,
status,
step,
update