I was very pleased with how the center support for the seat went together. I wanted it to be 1/2" plywood, which I did not have on-hand. So, I cut two pieces from 1/4" marine-grade Douglas Fir plywood, with the intention of laminating them together.
Once I had all the parts cut, (two 1/4" plywood supports, and 4 pieces of 1" x 1" mahogany blocking), I glued them all together with thickened epoxy. The Raptor stapler I bought last year once again proved perfect for holding the plywood parts together while the epoxy cured.
After the epoxy cured overnight, I sanded the edges smooth, and snipped and sanded the Raptor staples. These staples sand away very easily, and virtually disappear. No need to pull them, and fill the holes... just leave them there.
Then I ran the top & bottom surfaces over a planer/jointer, and it was ready for the next step.
Read More..
 |
| Plywood parts, cut from the poster board template. |
 |
| Plywood parts, cut from the poster board template. |
 |
| The plastic Raptor staples were perfect for holding the plywood pieces together. |
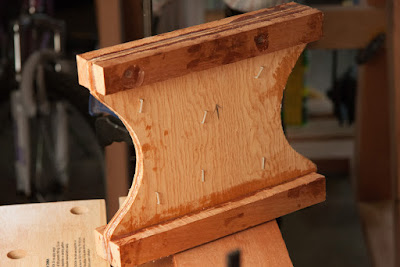 |
| Seat support, prior to being sanded & planed. |
Then I ran the top & bottom surfaces over a planer/jointer, and it was ready for the next step.
 |
| The sanded & planed seat support, sitting in its position on the keel. |
 |
| The sanded & planed seat support, sitting in position n the keel. |
From that point, it was time to cut the seat. According to measurements, the front edge of the seat needed to be 49" wide, and the back edge 47.5". The side edges needed to be cut at a 15° bevel to match the sides of the hull.
So, I drew and cut it from a piece of A-C exterior grade plywood I had on-hand. With a little minor fitting, it set into place just as well as Id hoped.
 |
| Seat cut from A-C exterior grade plywood. |
 |
| Seat cut from A-C exterior grade plywood. |
Without intending to, I cut the A-C plywood "ugly side up" (the C side). However, that wont really matter. My plan is to laminate a piece of the BS1088 Meranti plywood on top, so that the seats will match the transom and deck.
The next step, however, is still to fit the blocking on each side of the hull to support the seat at the ends.


