Pages

Tampilkan postingan dengan label test. Tampilkan semua postingan

Minggu, 08 Januari 2017

Yurt Report Wind Test

Two nights ago, the yurt underwent a spontaneous wind test.  A front with wind gusts up to 50mph moved through the area.  The bushes and trees were rattling against the fences and roofs and making a spectacular amount of noise.  And then I realized that I had recently skinned up the yurt.  It had survived the previous winter without problems but that was as a bare frame.  With the skin on, the wind would be able to exert more pressure on it.  I was tempted to drive out to the shop and check the yurt right away but decided to wait till morning to assess the damage if any.
Next morning I drove to the shop.  The first thing I saw was the flag down on the ground.  This wasnt a good sign. 

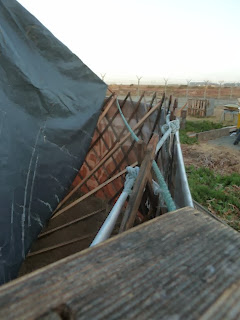
I went to the back of the shop with some trepidation but there was the yurt, still standing, albeit with the roof cover partly blown off.  This was no big deal since I had not sewn the final seam and the cover had a tendency to get blown off even in a light wind.

A few of the roof poles had also lost their moorings and fallen to the ground. I suspect what happened that made the poles fall down was that the flexing of the wall in the wind distorted the round shape of the walls into an oval, popping off the tension band and allowing the top of the wall to bow out to where the roof poles were able to pull loose.
The tension band, the green rope, is inside the wall instead of outside, apparently just rolled over the top of the wall.
Putting the yurt back together took maybe 15 minutes. So the test was useful, revealed some more of how the yurt works.  I already knew that the wall was a little too flexible.  Now I knew another reason why it should be a little stiffer, to not distort in a strong wind and allow the roof poles to come loose.  Also the roof covering needs better tiedowns, something I just hadnt bothered with yet.

Oh, and I untangled the flag and got it back to the top of the pole.

Read More..

Kamis, 22 September 2016

Single Bladed Paddles Get a Tank Test

Ive been working on a bunch of single bladed paddles for a number of reasons.  The first is that I was making a single bladed paddle blank for one of my kayak students. And once I got going on that paddle, I thought, why not make a bunch more. The second reason is that when I make double bladed kayak paddles,  I always have some thirty inch lengths of wood left over that I cant use on the double bladed paddles but that are long enough for single bladed paddles.
So I got four paddles roughed in for myself, two are the Aleut single bladed paddles I made out of a double bladed paddle that I had cut in half.  Go back a few posts for the details on that. And two of the paddles were canoe paddles of roughly Ojibwe style.  At least I think one of them is since its based on lines I took off a paddle I saw at the Ojebwe Museum in Lac Du Flambeau, Wisconsin.
Photo of my SOF canoe at the Encinal boat ramp on SF Bay.  The dark blue part is the Bay.  The medium blue stripe along the horizon is the SF peninsula.
Heres a 3/4 shot of the canoe with paddles spread out for the photo.
A better view of the paddles from the blade end.  The two on either side are the two halves of the former double balded Aleut paddle.  The second from the left has an eight inch wide blade and a length of 64 inches.  The third from the left is based on the paddle in the Ojebwe Museum.  The blade on that one is six inches wide and total length is 68 inches.
And this is a view from the end of the handles.  The two middle handles are based on traditional Ojibwe samples.  The two on the outside are tee handles mortised to the ends of the paddles.  After taking the paddles out I decided to round over the outside edges of the handles some more since I found myself using them with the upper hand on the outer edge of the handle rather than square in the middle as you might think.  This is the kind of thing one discovers on tank tests.
What found on the tank test was that I really liked the Aleut paddles even though they had less surface area than the other two canoe type paddles.  On the other hand, the canoe paddles, especially the one that was 68 inches long worked better for paddling on one side only by transitioning to a rudder stroke at the end of each propulsion stroke.  With the Aleut paddles, I had to do two strokes on one side then switch to the other side to get the boat to swivel back in the other direction.  Im not sure why that was, it may simply have been that with the canoe paddles with their bigger blade area I was able to do a rudder stroke more easily.
Read More..

Jumat, 09 September 2016

What Killed the Kayak Aleut Version Akutan Alaska

Akutan, Alaska is an island in the Aleutians and once a place where people paddled kayaks as a part of making a living.  Nowadays the biggest industry on the island is a fish processing plant.  Trawlers scrape the bottom of the ocean for fish and bring them to the processing plant to have them turned into product suitable for sale in the lower 48. The Aleut population of the island actually has very little to do with the fish plant other than extracting rent from them.  Still, the kayak as a tool for hunting, fishing and whaling is no longer in use.
The fish plant at Akutan.
Photo courtesy of Kurt Schmidt

The big  rusty things are doors on a trawl. Picture a net like a large sock with one of these doors on either side sliding along the bottom and funneling fish into the sock.  Nothing escapes.
Human added for scale.
Iron weights hold the bottom of the net close to the bottom of the ocean.
Nets.

Nets.
Bye, bye Akutan Kayaks.

Read More..

Minggu, 19 Juni 2016

Test fit

Centerboard alot originally ended at the front seat.   I  needed to remove up to the kingpost to raise the board fully.  

I did find that a flashlight shining through the pivot holes from side to side made it easy for me to position the centerboard in the slot.  Cool find. 


I needed to cut the final 2" forward into the bow seating area up to the centerboard kingpost in order to get the board to fully retract into the case.  All is good now.  Glad I did this.  

board goes up and down.  
11-8-14
Started screwing in the center seat.  Immediately broke off a screw in the top of the seat when it hit the horizontal screw going into the seat cleat.  Decided afterwards to use larger screws on the cleats and forgo the glue.  Will plug the gaffe. 

Stepping on the seats prior to gluing led to a small crack where the butt blocks are on the same places port and starboard.  Will glue these up and get this deck on permanently to strengthen these area.  Afterwards, I will add inspection ports to the tanks port and starboard.  This will allow to add the empty wine bladders and inspect the areas for moisture, as well as ventilate during storage.  

11-11-14 
Epoxied seats to framing today,  Forward portion under the seats is sealed with Sikaflex, as well as the internal bulkhead that separates the storage compartment from the flotation compartment.  I think it is sealed tight at this point in time.  Will add 6" ports just forward of the bulkhead for inspection purposes and to extract the small inflated wine bladder (from a boxed wine) that is still in the starboard compartment.  If it is still inflated come spring, will add more.  

I also installed seat drains so that when the boat is heeled, the seats will drain or at least avoid a huge puddle.  


All that is left is to remove all the tiny sheet rock screws, and fill the seams with epoxy filler.  Will try to fair the hole around the drain plugs as well.  


Read More..

Selasa, 17 Mei 2016

Yurt Report Fire Test

Another update on the yurt.  As my shop mate Tim said, I liked it better when you were building boats.  Still, yurts is what you get for now.  This report is on the fire test, that is, on a test of whether I could build a fire in the yurt without choking on the smoke. 
But first, some outside views of the sixteen foot yurt with a skin on it.  This skin consists of big plastic banners that have done their duty.  They consist of a fabric substrate that is then coated with some sort of plastic.  On this, the graphic is printed. And when the date for the advertisement expires, they are tossed or handed off to some recycler. I got these from my friend Tim who got them from a neighbor. So yes, theyre  recycled.
I dont know why, but this particular skin gives the yurt a decided third world look.  Maybe its the ragged edge on the roof and the dirt on the white banner and the advertisement on the outside.  Looks like a place where you could buy used motor oil.


With just the white wall showing, the place looks a little more dignified.  Ropes that hold the roof and the wall in place courtesy of a friend who sold his sailboat.  Also ropes abandoned by fishing boats and washed ashore at Point Reyes National Seashore.

As I said, this is a test, the 16 foot yurt being a prototype for all aspects of the yurt technology. So far the test of the banners as a covering material has gone on for about a year.  I have already been using the banners as a cover for my kayaks.  What I found out is that the plastic deteriorates within a year, probably at the same rate as those ubiquitous blue tarps sold everywhere.   So I would probably use these plastic sheets only for temporary installations.  The amount of work to do a good job on covers isnt worth it given the short life of this stuff.  Still, for prototyping, they are just fine.  Beside the short lifetime of the banners, another major shortcoming is that they are heavy and stiff, especially in cold weather and getting them installed is quite a chore, especially for the roof.  The walls are not a problem.  There the stiffness is an asset. Plus you have to not be put off by whatever commercial message is printed on the banners. 
And now for the fire test.
The fire in progress with a bucket of water standing by just in case.
Here it is, the fire.  While the fire got going the yurt filled up with a good deal of smoke because the fire wasnt creating enough heat to generate a good updraft that would pull the smoke out of the smoke hole.  But once it burned nice and hot, the smoke was minimal, but that was with the door open.  I will have to do more testing, but I would say that with the door closed, you wouldnt really want a fire inside.  But then, having a fire would hardly be of much benefit. 
Also, this yurt is quite tall with 64 inch high walls and the smoke hole at about 10 feet elevation.  So this is a fair size space to dissipate the smoke. So for now, recommendations are, keep the sticks small to minimize smoke.  Get the fire going good and hot before you invite anyone inside the yurt, ideally, you would build up a good bed of embers first so any new wood on the fire would burn quickly without a lot of smoke.
Or get a stove. I ordered one and will report on that soon as I get it.
Shortly after sunset with some color remaining in the sky and the San Francisco skyline in the background and the tail end of Alameda in the foreground just past the yurt. 
Pretty much the same shot as the one before but with the sky just a bit darker and the yurt lit up just a little more. Either I stoked the fire or the sky got darker and the camera gave the whole picture a little more exposure.  In any case, the yurt is positively glowing.
Read More..

Kamis, 17 Maret 2016

Wood and Canvas Canoe Restoration Impending

I am about to launch into another wood and canvas canoe restoration, assuming the owner is willing to spend the money.  A new one of these kinds of canoes is about $4000, so anything less than $2000 for a restoration is probably a good deal.  Perhaps you would pay more if the boat was an heirloom and you have some emotional connection with it.
This boat looks like a good candidate.  The hull is in fairly good shape. It needs some varnish stripping, some new planking, new skin, paint, interior varnish, outwales, gunwale caps, thwarts and seat restoration and seat hardware. And after all that was replaced or fixed, the boat would once again look spiffy. And of course it would have that old-timey wood, paint and brass, handmade look.


The canoe minus its canvas skin.  Planking is white cedar over white cedar ribs.


A view of the top of the canoe, partially decked in mahogany.

Interior view showing ribs and assortment of rotted wood trim. 

Closeup on the rotted trim.  The curved piece at the top left is one of the exterior stems.


Read More..